
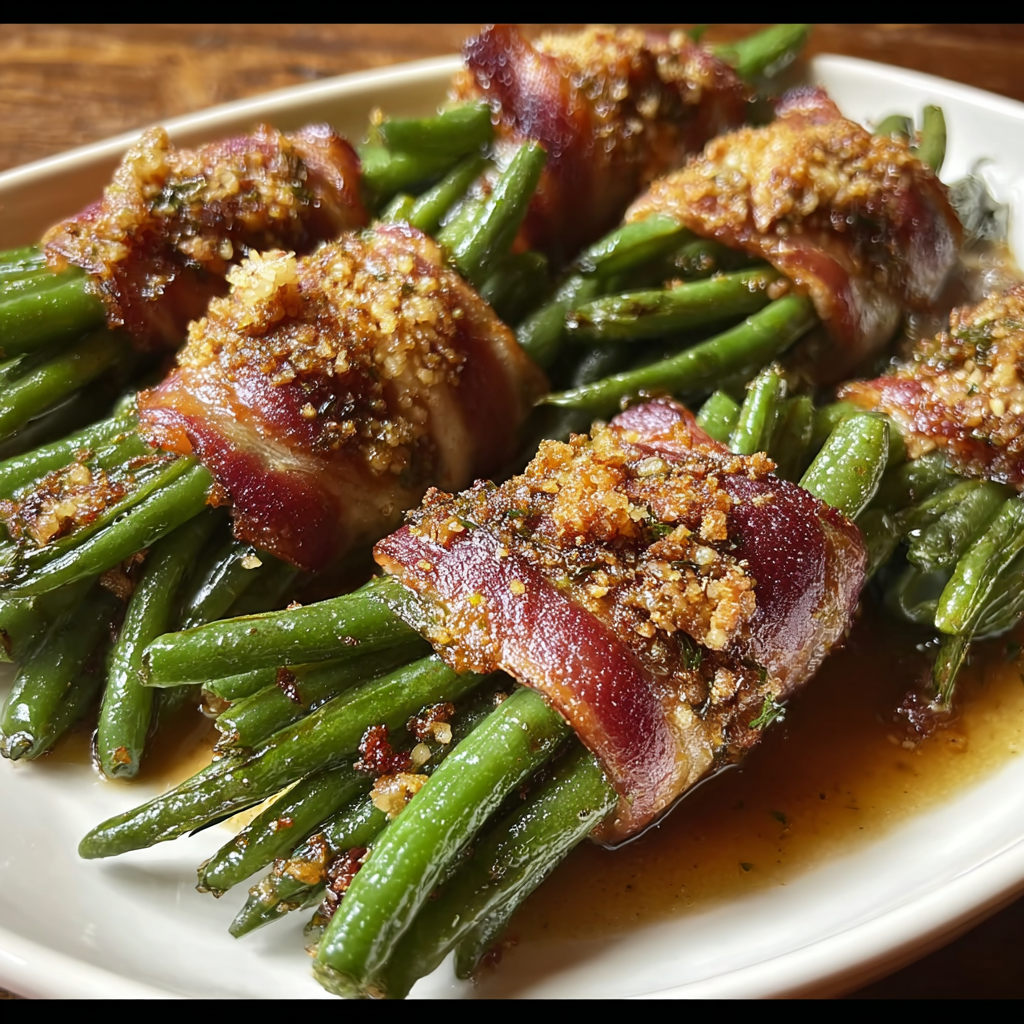
Green Bean Bundles

Bacon-wrapped green beans glazed with brown sugar and garlic — an elegant, low-carb side perfect for holidays and special dinners.
This dish came into my rotation the winter I wanted a show-stopping side that wasn’t fussy but still felt festive. I discovered the simple magic of wrapping crisp-tender green beans in bacon one chilly December when I was testing ideas for a holiday menu. The first time I served these, the table went quiet as everyone tasted the contrast of the smoky, salty bacon with the sweet brown sugar glaze and the fresh snap of the beans. My partner still jokes that these are the reason he doesn’t skip vegetables anymore — and that’s the real victory.
What makes these bundles special is the texture play and the balance of flavors: a thin crisp of rendered bacon, the bright, slightly crunchy green beans inside, and a sticky-sweet glaze that caramelizes just enough without overpowering. I prefer using thin-cut bacon and seriously recommend the quick blanch-and-shock method to keep the beans vivid green and perfectly tender. Serve them hot straight from the oven — they’re elegant enough for a holiday spread yet easy enough for weeknight company.
Why You'll Love This Recipe
- This side is ready in under an hour: 20 minutes active prep and 35 minutes in the oven, making it easy to slot into a busy holiday timeline.
- Uses pantry staples plus fresh green beans and common proteins — you likely already have everything on hand.
- Make-ahead friendly: blanch and shock the beans up to a day ahead, then assemble and bake right before serving for peak crispness.
- Low-carb and naturally adaptable to be gluten-free — swap soy sauce for tamari or gluten-free soy sauce to keep it compliant.
- Visually elegant: individual bundles make plating attractive and portion control simple; 12 bundles serve six as a side.
Personally, these bundles have become my go-to for holiday dinners. Family members who usually reach for heavier sides always come back for seconds. I’ve learned to trust thin bacon and a confident glaze — too much glaze overwhelms the beans, but just enough gives you that signature caramelized finish.
Ingredients
- Fresh French green beans (1 pound): Choose bright green, firm beans that snap when bent. French (haricots verts) are thinner and cook quickly, keeping a delicate bite. Trim the ends and remove any stringy fibers for the best texture.
- Butter (4 tablespoons, melted): Use unsalted for more control over seasoning, or salted if that’s what you have. Melted butter helps the glaze adhere and adds richness; for a dairy-free swap, use melted neutral oil or plant-based spread.
- Brown sugar (2 tablespoons): Light brown sugar gives the glaze a mild molasses note and encourages caramelization. Packed lightly into the spoon for accurate measurement.
- Garlic seasoning blend (1 teaspoon): Any jarred blend is fine — choose one with parsley, onion, and garlic for balanced flavor. Fresh minced garlic can be used but watch for burning in the oven.
- Soy sauce (1 tablespoon): For gluten-free kitchens, substitute tamari or certified gluten-free soy sauce. This splash adds umami and helps balance the sweetness.
- Bacon (6 slices, cut in half): Use thin-cut slices so they wrap easily and crisp through in the oven. Thick-cut bacon can be used but may require longer cooking or par-cooking to render.
Instructions
Blanch the beans: Preheat your oven to 400°F. Bring a large pot of salted water to a rolling boil and add trimmed green beans. Boil for 5–6 minutes until beans are crisp-tender — they should still have a slight bite. Immediately transfer the beans to an ice water bath to stop cooking and preserve color. Drain thoroughly so bundles aren’t watery. Make the glaze: In a small bowl, whisk together melted butter, brown sugar, garlic seasoning, and soy sauce until thick and paste-like. The sugar should be mostly dissolved and the mixture should coat the back of a spoon. If using a gluten-free soy substitute, ensure it’s well mixed to avoid mottled glazing. Assemble bundles: Gather 5–7 green beans into neat little bundles, aiming for consistent size so they cook evenly. Wrap each bundle with a half slice of bacon and press to secure; the bacon should be snug but not overly tight. Use a toothpick if needed — just remove before serving or instruct guests accordingly. Bake to perfection: Arrange bundles on a rimmed baking sheet or in an oven-safe skillet with the seam side down. Sprinkle a pinch of extra garlic seasoning over each bundle, then brush or spoon the brown sugar glaze generously so each bundle is coated. Bake at 400°F for 30–35 minutes until the bacon is deeply golden and crisp, rotating the pan once halfway through for even browning. Rest and serve: Let the bundles rest for 2–3 minutes after removing from the oven so the glaze sets slightly. Serve hot so the texture contrast is at its best; the glaze will thicken as it cools, making the bundles easier to pick up and eat.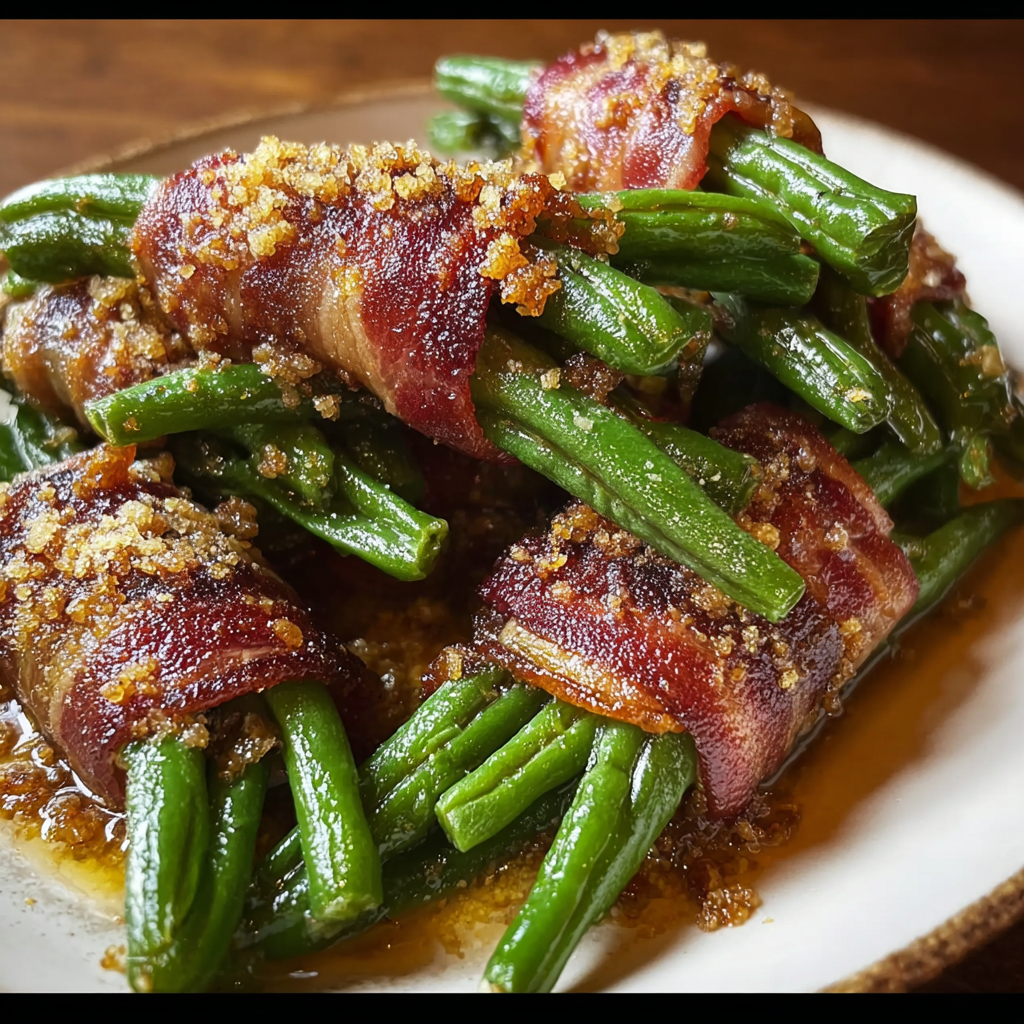
You Must Know
- These bundles freeze well if baked first: flash-freeze on a tray then store in airtight bags for up to 3 months; reheat in a 375°F oven until warmed through to retain crispness.
- High in protein and fat from the bacon, this side is low in carbohydrates if you prefer a lower-carb menu — each serving contains minimal net carbs thanks to the modest brown sugar.
- Store leftovers in the refrigerator for up to 3 days; reheat in the oven or an air fryer to crisp the bacon back up rather than microwaving, which softens it.
- For a gluten-free label, use tamari or a certified gluten-free soy sauce; otherwise traditional soy sauce may contain wheat.
My favorite part of this dish is how it elevates a simple vegetable into something guests remember. A neighbor once told me these were the first vegetable she liked since childhood — small wins like that are why I keep this in my repertoire.

Storage Tips
Store cooled bundles in an airtight container in the refrigerator for up to 3 days. To freeze, arrange baked bundles in a single layer on a baking sheet and flash-freeze until solid (about 1–2 hours), then transfer to a freezer-safe bag for up to 3 months. When reheating, bake from frozen at 375°F for 12–18 minutes or until heated through and the bacon crisps again. Avoid microwaving if you want to keep the bacon crisp; instead, use a conventional oven or air fryer for best texture.
Ingredient Substitutions
If you prefer less sugar, reduce brown sugar to 1 tablespoon and add a splash of apple cider vinegar or lemon to keep brightness. For dairy-free kitchens, swap melted butter with melted coconut oil or a neutral vegetable oil — note that coconut oil imparts a subtle flavor. To make this vegetarian, use smoked tempeh or thin slices of king oyster mushroom in place of bacon and roast until edges caramelize; results will be different in texture but still flavorful. For gluten-free, always use tamari or gluten-free soy sauce in the glaze.
Serving Suggestions
These bundles pair beautifully with roasted poultry, glazed ham, or a simple roast beef to balance rich mains with a fresh vegetable. Garnish with a sprinkle of toasted sesame seeds or finely chopped parsley for color. For a holiday spread, present them on a warm platter lined with parchment and scatter roasted nuts or orange slices around for festive color contrast.
Cultural Background
Wrapping vegetables or other small bites in cured meats is a technique found across many culinary traditions — from prosciutto-wrapped asparagus in Italian-influenced menus to bacon-wrapped dates in Middle Eastern and modern American party food. This particular combination — green beans with bacon and a sweet glaze — is a modern American twist that leans on classic holiday flavors: salty, sweet, and savory, designed to complement richer main courses.
Seasonal Adaptations
In spring and summer, use the thinnest haricots verts you can find for delicate bundles; in winter, pair the dish with roasted root vegetables and add a pinch of smoked paprika to the glaze for warmth. For holiday adaptations, swap brown sugar for maple syrup and finish with a few flakes of flaky sea salt after baking to enhance the sweet-smoky interplay.
Meal Prep Tips
For streamlined meal prep, blanch and shock the beans the day before and keep them in a sealed container in the fridge. Prepare the glaze and assemble bundles up to 8 hours in advance, covered on a tray; refrigerate and bake directly from cold, adding a few extra minutes to the oven time. This approach frees up oven time and reduces last-minute stress on busy holiday days.
These bacon-wrapped green bean bundles are a small, handsome side that carry big flavor. They’re reliable, adaptable, and always a crowd-pleaser — make a double batch if you expect enthusiastic guests.
Pro Tips
Blanch and shock the beans to preserve color and achieve tender-crisp texture before wrapping.
Use thin-cut bacon so it crisps through in the oven; thick-cut may require par-cooking.
Brush the glaze on generously but not excessively — too much sugar can burn during baking.
This nourishing green bean bundles recipe is sure to be a staple in your kitchen. Enjoy every moist, high protein slice — it is perfect for breakfast or as a wholesome snack any time.
FAQs about Recipes
Why do you blanch the green beans first?
Blanching stops cooking and keeps the beans bright green; shocking in ice water prevents overcooking so they finish tender-crisp in the oven.
How can I make this gluten-free or dairy-free?
Use tamari or a certified gluten-free soy sauce. If you need dairy-free, substitute melted coconut oil or a neutral oil for butter.
Tags
Green Bean Bundles
This Green Bean Bundles recipe makes perfectly juicy, tender, and flavorful steak every time! Serve with potatoes and a side salad for an unforgettable dinner in under 30 minutes.
Instructions
Preheat and blanch
Preheat oven to 400°F. Bring a large pot of salted water to a boil. Add trimmed green beans and cook 5–6 minutes until crisp-tender. Transfer immediately to a bowl of ice water to stop cooking and preserve color. Drain well.
Prepare the glaze
Whisk together melted butter, brown sugar, garlic seasoning, and soy sauce until it forms a thick, paste-like consistency. Set aside while you assemble bundles.
Assemble bundles
Gather 5–7 green beans into a small bundle and wrap with a half slice of bacon, securing snugly but not overly tight. Repeat until you have 12 bundles.
Arrange and season
Place bundles seam-side down on a rimmed baking sheet or in an oven-safe skillet. Sprinkle a little extra garlic seasoning over each bundle and brush or spoon the glaze to coat thoroughly.
Bake and finish
Bake at 400°F for 30–35 minutes, rotating once for even browning, until bacon is crispy and glaze is caramelized. Let rest 2–3 minutes before serving.
Last Step: Please leave a rating and comment letting us know how you liked this recipe! This helps our business to thrive and continue providing free, high-quality recipes for you.
Nutrition
Did You Make This?
Leave a comment & rating below or tag
@royalrecipe on social media!
Categories:
You might also like...
Green Bean Bundles
Bacon-wrapped green beans glazed with brown sugar and garlic — an elegant, low-carb side perfect for holidays and special dinners.
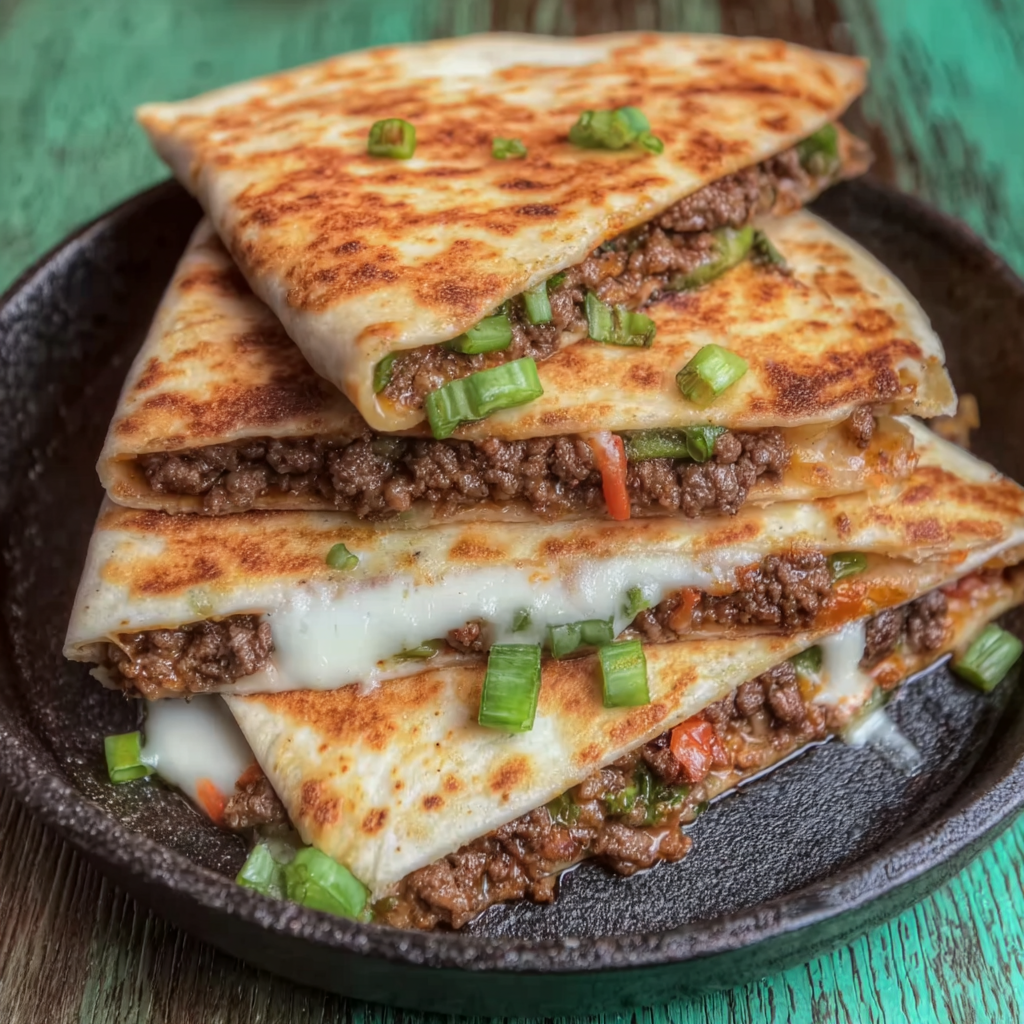
Korean Beef Quesadillas
Flour tortillas filled with sweet-savory Korean beef, melted mozzarella, and crisp green onions — a quick fusion comfort snack or light meal.
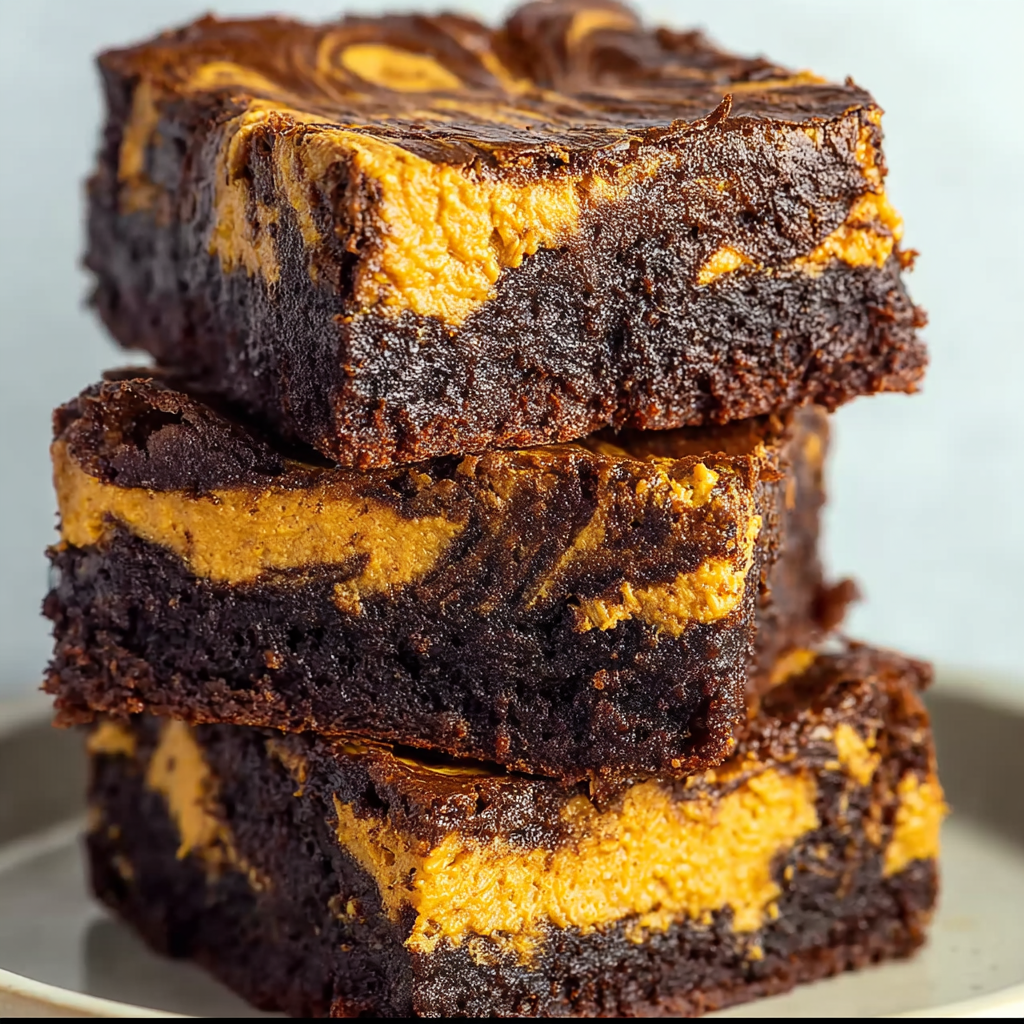
Pumpkin Swirl Brownies
Fudgy chocolate brownies swirled with a creamy spiced pumpkin layer — a perfect fall dessert that's rich, seasonal, and ready in under an hour.
Did You Make This?
Leave a comment & rating below or tag @royalrecipe on social media!
Rate This Recipe
Share This Recipe
Enjoyed this recipe? Share it with friends and family, and don't forget to leave a review!
Comments (1)
This recipe looks amazing! Can't wait to try it.
Comments are stored locally in your browser. Server comments are displayed alongside your local comments.

Hi, I'm Olivia!
What's Popular
30-Minute Meals!
Join to receive our email series which contains a round-up of some of our quick and easy family favorite recipes.